How-to: Send your first marketing email
- Austin
- Feb 12, 2023
- 4 min read
Updated: Apr 2, 2023
First off, congrats! If you're planning how to being sending marketing email to your customers, you surely have an exciting road ahead of you. Whether it be a new business, or service, good things are to come. Let's take a step by step walk through how to send your first marketing email.
To begin sending effective, action-driving email, you're going to need the right tools. While emailing users though Gmail might work on a small scale, as you plan for the long-term, there are email service providers (ESPs) that exist to help you succeed on the grand scale, and the good news is most let you get started for free.
Step 1: Choose your tool
My recommended ESP would be SendGrid. SendGrid is not only the leader in the transactional email space, but also has an easy to use and effective email marketing tool, which is what we'll examine here.
SendGrid's free plan will allow you to store up to 2,000 contacts (subscriber email addresses + data if you have it) and send up to 6,000 emails per month. Of course, whenever you outgrown that, they you can easily upgrade your plan.
Once you signup and create your account, you're ready to get started.
2. Setup your account
You'll get started within the Dashboard of your account. Here you can access all that SendGrid has to offer, however, for sending your first marketing email, we'll mostly stick to the 'Marketing' and 'Design Library' sections on the left.

Next, we'll get into the specific steps you'll need to complete to enable your account to be successful. There are just a handful.
2a. Verify your sender
You're marketing email while sent through SendGrid still needs to be sent through a domain that you own. So, assuming you have an email address for your business, for example, info@something.com, you'll want to use that.
Navigate to the 'Senders' section of the left nav and then click 'Create New Sender' in the top right.
Next, Add a Sender.

2b. Create an unsubscribe group
Next up, you'll want to create an unsubscribe group. Unsubscribe groups allow you to provide your recipients options to opt-out of a certain type of email. For example, if you're sending seasonal sale emails and create an unsubscribe group for seasonal sale emails to use in those campaigns, if any of your customers happen to unsubscribe from your seasonal sale emails, they'll specifically be unsubscribing from the seasonal sale. So, they'll be opted-out of that type of communication, but you haven't necessary lost them for good if you have other types to send.

Opt-Out Preferences
SendGrid also allow you to a preferences center, where you can include all of your communication types and let your customers decide which they want to be included in, and opt-out of. This is definitely ideal if you can think this far ahead.
Learn more about preference centers in this Email Preference Center Perfection post from SendGrid.
2c. Import your users
Of course, you're going to need to have acquired your customer and prospect email addresses prior to import into the 'Contacts' section of SendGrid, however, if you don't have these, they do offer the ability to create lead capture form, in other works, forms to put somewhere (like your website) to capture user email addresses into SendGrid.
Anyways, you'll want to make sure you only include users who have opted-in, or gave you permission to email them.
Next step, upload your csv excel document with a column for 'Email Address' and whatever other data you would like to include into those contact profiles, such as first name, region, etc.
3. Create a template
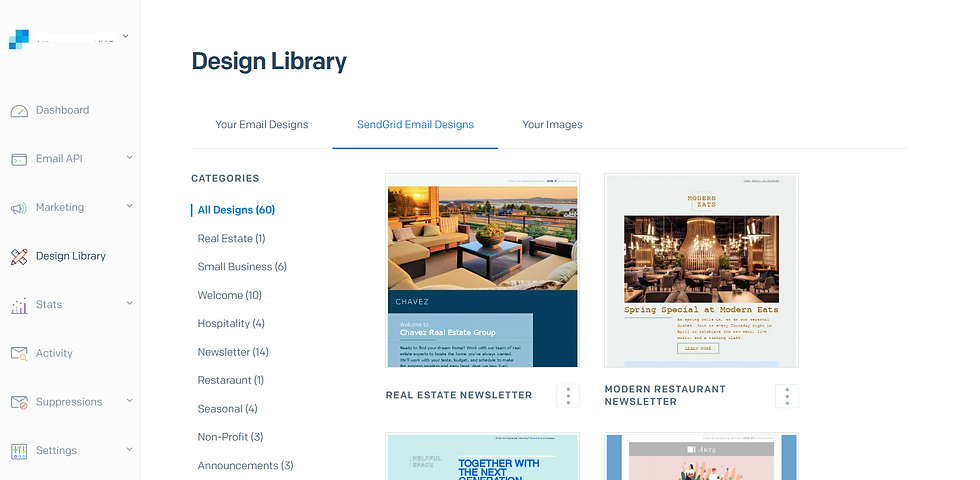
Next up, head to Design Library on the left navigation. It's time to create a template. Here's you'll have the option of starting from scratch and either using HTML or SendGrid's visual, drag-and-drop editor, or getting a head with one of their premade email designs.
Of course, you can always head to Lifecycle Marketing Tips email templates page and see what's available from top brands as well.
Here is where your success is really in your hands. This is where you'll have to add your own messaging. Will your first email be to say thank you to your customers? Will it be a newsletter, or a sale for your products? This is where it's up to you!
Once you have your message planned, spend some time getting familiar with the design tool. While it's not perfect, a few minutes messing around can really help you pick up the quirks of it, and begin to feel comfortable editing and adjusting your template.
Don't forget to add your subject line, sender, unsubscribe group, list to send to, etc. on the left navigation.

Send yourself a test!
Have a business partner, or coworker? Send them a test too. You can send unlimited tests, and sending test for additional help reviewing spelling, making sure links work and all that is very important.
4 Hit send

When you've triple checked your email setup aka sending to the right list, with the right email content (triple check those links work!) you're good to schedule your send.
Choose to send immediately, or schedule for a further time.
Some final thoughts:
There are a few additional best practices and takeaways as you begin your marketing journey.
Content: Your emails are only as good as your content. Make sure you're always sending email content that provides value to your users. If you're only trying to take from them (for example, selling) that's going to get old pretty quick and you're going to see users unsubscribe.
Analytics and reporting: Once your email launches, keep tabs on how your email is performing. Email Service Provider's like SendGrid make it very easy to check in on how past sends have done. Build on what's worked well, and pivot away from what hasn't.
Deliverability: Make sure you're only sending to users who've intentionally signed up for your marketing messaging. Your practices here will actually have a major affect on your performance of your campaigns. The successfulness of your emails within email inboxes is called email deliverability, and it's actually quite a big industry, with experts helping major sender optimize their accounts to make sure their mail is delivered and not landing in the spam folder. Nothing to get caught up on for your first send, but a good rule of thought is only to send mail that you know your recipient actively signed up for you.
Learn more about email deliverability from the experts at SendGrid, then head back over to lifecyclemarketingtips.com.


Comments